Showing posts with label cuttlebug. Show all posts

Tuesday, March 5, 2013

Practical Scrappers DT Project- Lantern


Happy Tuesday Krafters!

It is that time again! Over at the Practical Scrappers we are getting the juices flowing with vellum. Vellum can be used to add a delicate or classy touch to your project. It can also tone down a bright paper or pattern. Trust me; it is to be used on more than just a wedding invitation! Check out how the other DT members used vellum!

I used vellum in two ways for my project. The first way was as the frosted glass in this lantern purchased from the Silhouette Store. On the lower parts of the lantern, I used the Musical Flourish Cuttlebug folder to emboss the vellum. I really like the texture the embossing added.


The second way I used vellum was as rolled flowers and a leaf. I used a Martha Stewart rose leaf punch for the leaf and deco scissors for the flowers. They look great next to the rolled flower from the Graphic 45’s Bontanicabella paper collection. I fussy cut the dragonfly from the collection. It just felt right with this lantern. As I was constructing this project, I imagined a lantern at a good fishing spot or in the back yard in the summer time….I cannot wait until it gets warmer!


Back to the project! To grunge up the lantern a bit, I added some copper Inka Gold. (*side note: be careful and check this product often if you have it. It tends to grow mold! I only notice it on the copper but not the other colors). I love the effect it gives cardstock! It makes it look like old metal. This has become one of my favorite things to do!


Well Krafters, that’s it! I hope you enjoyed today’s project. Remember to stop by the Practical Scrappers' blog for more inspiration. Thanks for stopping by, Krafthead~

Supplies:
Lantern-Silhouette Studio
Silhouette Studio
Cuttlebug
Musical Flourish Embossing Folder
Recollections-Vellum
Graphic 45-Bontanicabella
Inka Gold-Copper
Scalloped Deco Scissors
Martha Stewart Rose Leaf
Tim Holtz- Ball Chain
Ribbon

Monday, August 20, 2012

Practical Scrappers DT Project: Notebook Doodles

Hi Krafters!

Can you believe school is starting soon! Where did the summer go? I know it will be one to remember as the heat has been off the charts! Not complaining though~

Today I am sharing my project for Practical Scrappers! I had so much fun doing this one J We had to make a school related project! Go over and check out the inspiration! Trust me, you will NOT be disappointed!


For this project, I used the Notebook Doodles Imagine cartridge. I *heart* that cartridge! Anywho, I printed the notebook page pattern and the pattern with the letters. The printed papers are layered on a piece of white cardstock that was embossed using the Collage Sizzix folder. The“ABC123” border was punched with a punch by EK Success. I also added some basic shapes to make a more elementary type design (hey my girls are in elementary school LOL).
The embellishments were fussy cut from the Me & My Big Idea Elementary stack. To finish off the design, I stamped “school” and “a day in the life” from some stamps I have in my stash. I almost forgot, the printed paper looked plain so I punched the notebook edge from another punch by EK Success J


I hope you enjoyed today’s project! Don’t forget to pop over to Practical Scrappers for more inspiration!

*I also wanted to say thank you to all of my new and existing followers! If I am not following you, please let me know so I can follow you as well! Thank you J

Products:
Notebook Doodles
Collage Sizzix Embossing Folder
EK Success Punches
Me & My Big Idea Paper Stack
Tea Dye Distress Ink

Friday, August 10, 2012

Mr. Fix It

TGIF Krafters!

Today I am sharing a quick card I made for my DH's friend. He is a jack of all trades and master of all. He has helped us tremendously over the years during our crash course in homeownership! Anywho, I just wanted to share :) Thanks for stopping by, Krafthead~


Products:

DCWV Guy Stack

Diamond Embossing Folder

Making Memories Metal Sheet

Friday, June 15, 2012

Recessed Graduation Card


Hello Krafters!

Today I am sharing a graduation card I made for my SIL. Her school colors were red and white. I wanted to stay with that color scheme. They pattern paper inside the frame is from the High school Stack by DCWV.


Front of the card:

Since I did not have the right pattern paper for this project, I decided to make my own for the front of the card. I took a graduation cap stamp and randomly stamp it on some solid card stock using Versa Mark. I used some Lindy’s Stamp Gang Embossing Powder. I love how this embossing powder leaves a nice shimmer on the cardstock. It almost makes it look like pearlized cardstock!  I took my ticket stub punch and used that one the edge of the pattern paper.

The frame was cut from the Elegant Edges Cricut cartridge.  I wanted to add texture to the frame because it was too plain. I embossed that with the African Batik embossing folder. The layer was placed on pop dots for dimension and for the “recessing”. For the diploma, I simply rolled a piece of scrap cardstock. The graduation cap was cut from the Wrap It Up cartridge (I think). Instead of using the tassel from the actual cut, I made my own from floss. The tassel is secured with a brad which was colored with Smooch. I stamped the sentiment with Stampin’ Up ink and added pearls using a red Viva Décor Pen.


The inside:

I took the same pattern paper from the recessed portion of the card and used the same punch I used on the front. It was layered with a piece of cardstock for the sentiment. The sentiment layer is also acts as a pocket for her monetary gift.


That is it! I wanted to keep this card simple and easy to make. I hope you all enjoyed today’s project! Thanks for stopping by, Krafthead~

Products:

DCWV High School Mat Stack

Recollections Cardstock-Red

Bazzill-White

Cuttlebug African Batik Embossing Folder

Elegant Edges

Lindy’s Stamp Gang Embossing Powder

Versa Mark

Stamps

Viva Décor Pen

Antique Linen Distress Ink

Black Soot

Floss

Brad

Smooch

We R Memory Keepers-Ticket Stub Punch


Pop Dots

Friday, February 24, 2012

Violin Birthday~

Happy Friday Krafters~
TGIF!! Today, I am sharing a birthday card for my SIL. She turned 18 on the 21st and she is a very accomplished violinist. I never used the Quarter Note cartridge. So I thought her love for the violin and her birthday was a perfect union for this card.
The base is white Bazzill (standard A2 size) distressed with Walnut Distress Ink. I used the Imagine More Imagine Cartridge for the pattern paper cut at 4x5.25”. The brown layer is Core’dinations Chocolate Lovers.
I used a labels Nestability for the background and the violin is cut at 3” from the Quarter Note Cricut Cartridge. I also stamped a ticket from an Inkadinkado stamp set. The sentiment comes from Close to My Heart which was stamped with Rich Cocoa Momento Ink. I then embossed the sentiment with clear embossing powder. The flowers are I Am Roses and some other flowers I purchased from Karlas001 etsy store a little while back. I also had a pearl strand I purchased from Karla in my stash. The butterfly is a charm that was also in my stash.
To give the card a little shimmer, I sprayed it with Iridescent Gold Glimmer Mist. I hope you enjoyed today’s project. Have a great weekend and “see” you all on Monday for another project, Krafthead~
Other Products Used:

Musical Flourish Embossing Folder
Ribbon

Prima E Line Pearl

Wednesday, February 22, 2012

17 Years~

Hi Krafters!
It has been a very long week and it is not even over yet LOL! My friend and her husband recently celebrated their 17th wedding anniversary. They met in college. They were just friends, but the husband was in a bad car accident. He had to leave school, and for a short time they kept in touch by writing letter. Eventually the letters stopped. A few years went by and my friend found out they he had married. She became engaged. More years went by and they ended up being in a wedding party together. By that time, her engagement was called off and he just finalized his divorce. Long story short, they are married a short time later and now have three beautiful children!
I thought this was the perfect card for them! It is not too feminine, but not too masculine either. I am in love with the Picot Edge Die so I find I am using it on almost everything I can LOL! I had to use it! This card was inspired by the Love Notes stamp. It went well with the postage stamp cut from the Sentiment Cricut Cartridge. I also knew I wanted to incorporate the numbers pattern on the TC B&W Imagine Cartridge.  I added a Pendant to emphasize the number 17 on the pattern…this is probably one of my favorite projects to date!
I hope you all enjoyed today’s project. As always, thanks for stopping by, Krafthead~


Materials:
Cricut Imagine
Teresa Collins Black & White
Sentiments Cricut Cartridge
Bazzill-Black
Paper Trey Ink-Vintage Cream
Cuttlebug-Script
Grand Calibur
Picot Edge Die
Pendant Die
Fancy Tags
Burlap
Vintage Lace
Antique Linen Distress Stain
Suede Glimmer Mist
Momento-Black
Gold Alcohol Ink
Flat Back Pearls-Pearl, Black
Ribbon
Love Note Stamp
Glossy Accents

Tuesday, February 14, 2012

Kiss Me~

Happy Valentine’s Day Krafters!!
Today I want to share a really quick and simple Valentine’s Day card that could be used for your sweetie! Have a wonderful Valentine’s Day and spend it with those you love! Krafthead~

*make sure you have your pattern paper facing the right way LOL*
Materials:
Cricut Craft Room
Cricut Mini
Sweethearts
Serenade
Pagoda
Stickles-Christmas Red
Cuttlebug
Hearts
D’vine Swirls
Bazzill
Rose Trim
DCWV-Madly In Love
Walnut Stain
Wood Grain Stamp
3D Pop Dots
Scor Tape

Friday, February 10, 2012

With Sympathy~

Happy Friday Krafters!
It has been a busy and strange week! It seems like forever since I posted a project. Did you all miss me? J I missed sharing projects with you all that’s for sure! A fellow member of my place of worship had a loss in her family. Since I am unable to make it to the services tomorrow, I decided to lift her spirits with a sympathy card. It was quick and easy to put together.
I hope you enjoyed and are inspired by today’s card. Thank you all for stopping by, Krafthead~


Materials:
Grand Calibur
Picot Edge Circle Nestabilities
DCWV-Coral Couture
Bazzill-White &Black
Recollection Pearls
Zva Pearl Flourish
Chalk Ink-Black
Momento Black Ink
Sentiment Rubber Stamp
Stamping Scrapping Rose Buds
Butterfly Punch
EK Success Scallop Punch
Vellum
Cuttlebug
Swiss Dots Embossing Folder
Pink by Design Hand Made By Stamp-on back; not shown
White Dove Button

Wednesday, January 25, 2012

First Crush~

Happy Wednesday Krafters~
I have been on a roll getting layouts completed. I am proud of myself! While I know many people have better skills and have a different "style" than me (I don't really have a style), I am happy with the results! Today, I would like to share a personal layout with a photo that is dear to my heart. This is part one!
This past summer DH and I took our children to the zoo with their god-parents. A young man from our previous church was there as well. For some reason, my then 4yo took a liking to him. He is 15 years her senior. The entire trip she wanted to hold his hand…check out her pose!
As always, I enjoy every visit! Take care, Krafthead~

Materials:
DCWV-Be Mine
Bo Bunny-Crush
Core’dinations-Canvas, Pink
Cricut Expression 2
Songbird
Distress Ink-Walnut Stain
I Am Roses
Copic Marker
Doves
Iridescent Pearls-Pink
Cuttlebug
Love Die Cut
Ribbon
Gel Pen


Thursday, December 22, 2011

Day 22-OCTC

Hey Krafters!
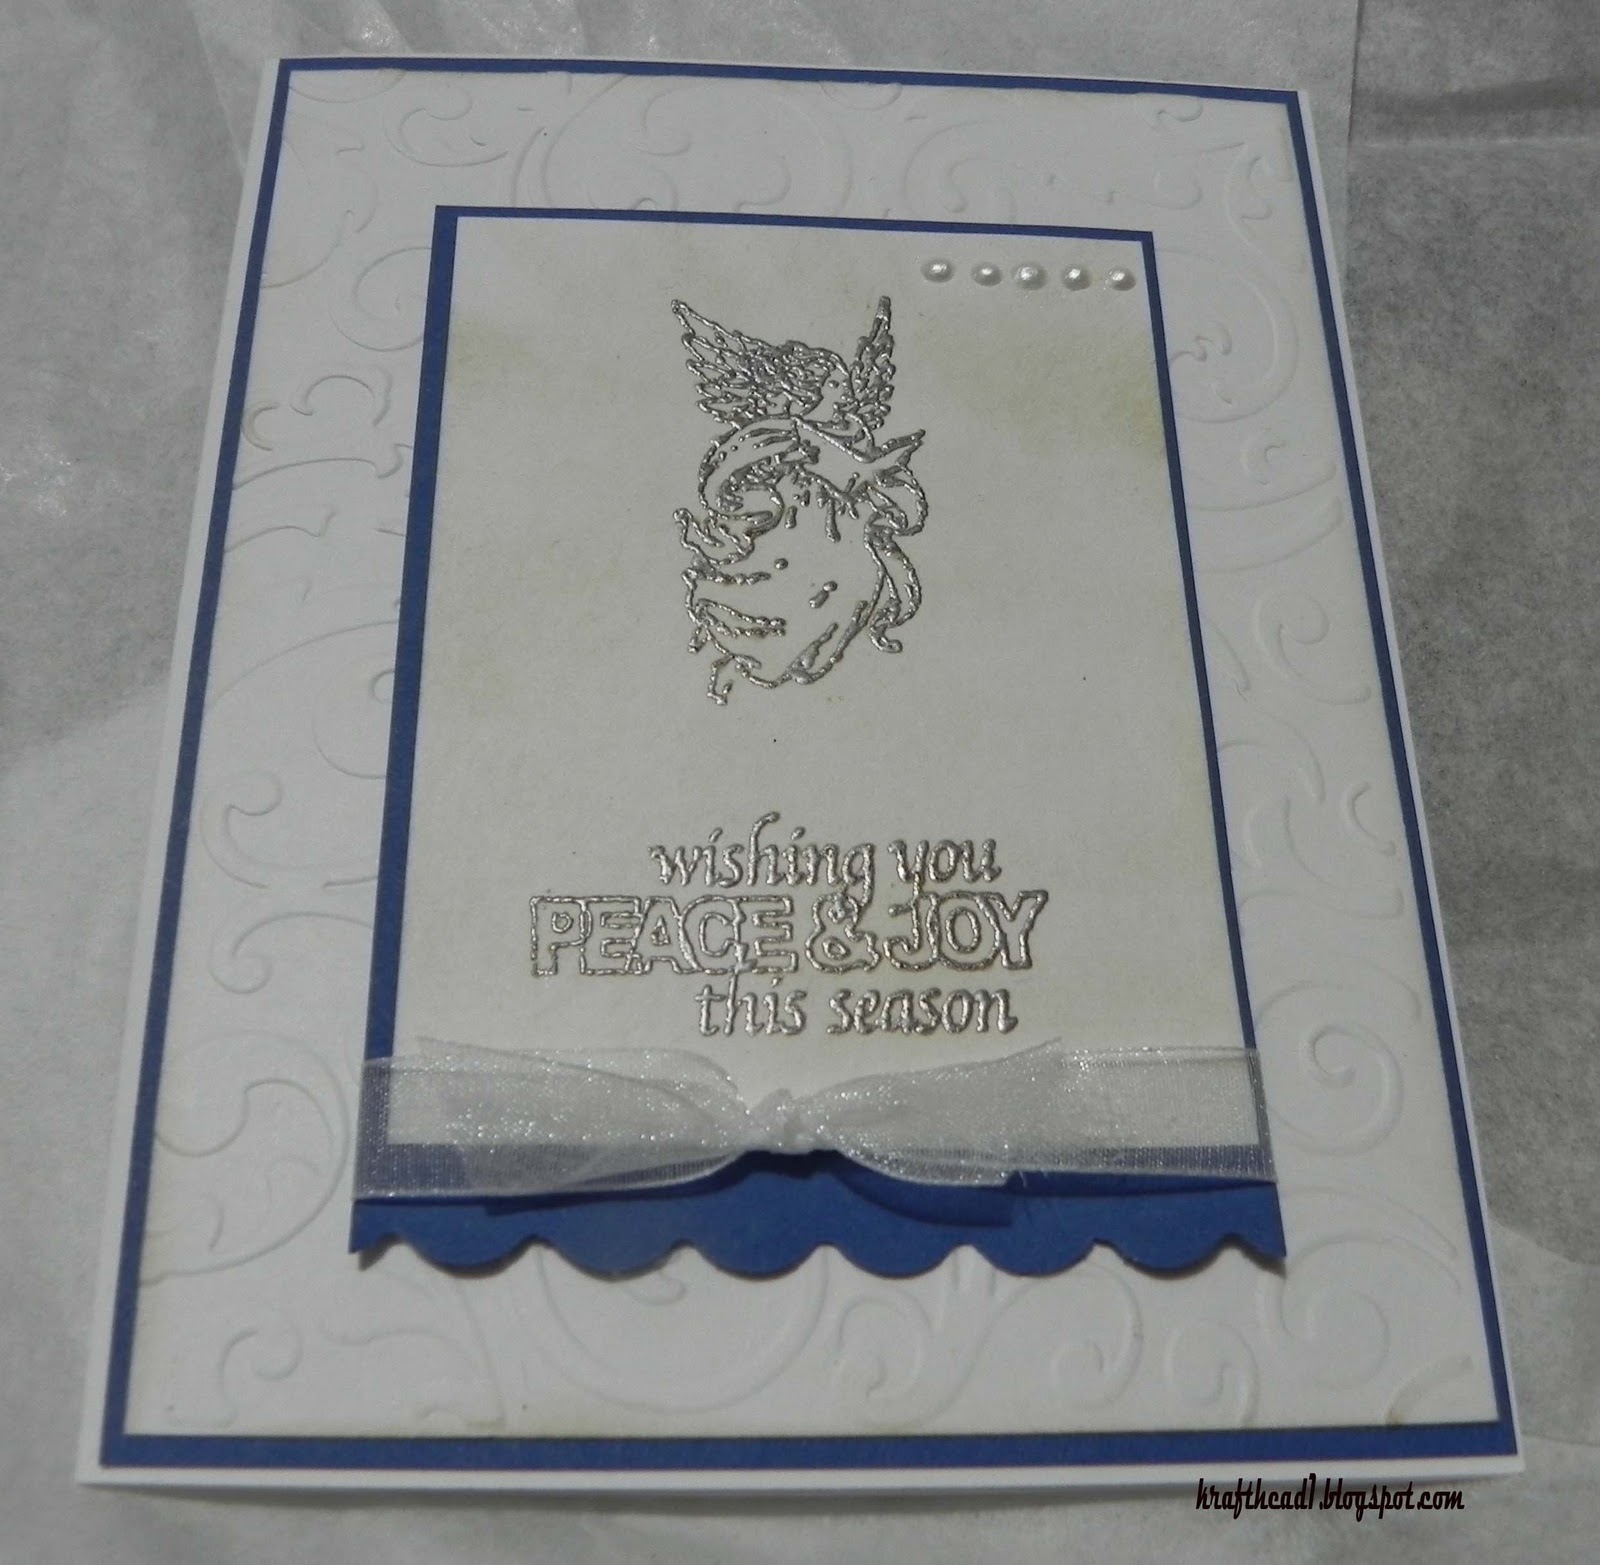
Welcome to day 22! Today, I would like to share a simple card. It took less than 10 minutes prep and put together. I used a Studio G stamp from the dollar spot at Joann’s Fabric. I stamped the image with Versa Mark and used Stampendous Silver Embossing Powder. That was the only technical part to the card. A few layers later…done! This card is easy to mass produce. Hope you were inspired.
Thanks for stopping by, Krafthead~
Materials:
Studio G Stamp
Versa Mark
Stampendous Embossing Powder-silver
Recollections Cardstock-blue
Bazzill Cardstock-white
Heat Tool
Old Paper Distress Ink
Viva Décor Pen-White
Ribbon
Fiskars Scallop Punch
Cuttlebug
Musical Flourish Embossing Folder

Monday, December 19, 2011

Day 19-OCTC

Happy Monday Krafters!

Gosh, can you believe Christmas is less than a week away? Are you done with your holiday shopping or krafting? I still have a couple of projects to finish up...it is down hill from here!

Today, I would like to share a simple, simple, simple card! I whipped this out in a matter of minutes with the help of my Cuttlebug, Imagine and Martha Stewart border punch!
Materials:
Cuttlebug-Winter Woodland Embossing Set
Imagine-Snow Angel
Martha Stewart Branch Punch
Diamond Stickles
Liquid Pearls
Bell
Ribbon
Black Soot Distress Ink

Monday, December 5, 2011

Operation Countdown to Christmas Day 5

Happy Monday Krafters!
Today is day 5 of Operation Countdown to Christmas. Here is a quick card I made using the Word Collage Cricut Cartridge and Snow Angel Imagine Cartridge.  This card is not one of my best, but I thought I would share it to show the versatility of Word Collage. You can use this cartridge for background papers, home décor, and so much more.
Thanks for coming by. Take care, Krafthead~
Materials:
Cricut Imagine
Snow Angel
Word Collage
Iridescent Gold Glimmer Mist
Gold Leafing Pen
Ornament Cuttlebug Embossing Folder
Cuttlebug
Viva Décor Pen-white
Stickles-Christmas Red/Green
Gold Cord
Bell


Sunday, December 4, 2011

Operation Countdown to Christmas Day 4

Happy Sunday Krafters,
Its Krafthead here for day four of the Operation Countdown to Christmas. Today I am sharing another card I made for the Second Annual Cricut Forum Holiday Card Challenge. Since Jesus is the reason for the season and it is Sunday, it is only fitting for me to share this angel card. I used the Christmas Noel Cricut Cartridge for the angel and snowflakes. The circle was cut from George.
I hope you enjoyed today's project and that you are inspired. Remember to check back often as we continue in the Operation Countdown to Christmas. Thanks for stopping by, Krafthead~
Materials:
Cricut Expression 2
Christmas Noel Cartridge
George Basic Shapes
D’vine Swirls Embossing Folder
Cuttlebug
Marvy Scalloped Oval Punch
DCWV Winter Combo-pattern paper 2010 release
Glitter Paper
Puffy Paint
Ribbon
Bell
Sentiment
Prima Say it in Pearls
Faded Jeans Distress Ink

Monday, October 24, 2011

Christmas House- SSSCreative Team Project

Hello Krafters!
It’s Krafthead here to share a cute interactive Christmas/holiday project using RM00126 from Scrappin with Sharon and Smokey’s store. Can you believe Christmas is right around the corner? I hope this project will inspire you to roll up your sleeves and get those holiday cards completed! Go on over to the store and check out her awesome files!
Expect the best today and I hope you all enjoy the project! Krafthead~


Materials:
Gazelle
MTC
Cricut Imagine (brick pattern-chimney/house front, wood patter-mailbox post)
Martha Stewart Seasonal Cricut Cartridge (icicles)
Stickles (baby blue, icicle)
Distress Ink (walnut stain)
Crackle paint (picket fence)
Twine
BB pellets
Ribbon
DCWV -Christmas Combo (stickers), Street Lace (curtains)
Recollections Paper (card base, windows, door, chimney top, snow and mailbox)
Glitter paper (roof)
Cuttlebug Embossing Folder (roof)
Brad (door knob)
White Gel Pen (mailbox

Friday, October 21, 2011

ATC Swap

Hello Krafters!
I’m here to share with you some ATCs I made for a swap over on YouTube. This is my first time doing ATCs as well as a swap-with the exception of swapping goodies! I really hope the recipients like them.
I used my Cricut and Gypsy to design these. The cuts are from Christmas Noel (wreath), Joys of the Season (stockings) and Christmas Cheer (fireplace and candles). For the wreath, I also used the Martha Stewart pine tree branch punch (discontinued).
For the fireplace: Since I don’t have the Sizzix brick embossing folder (I so want it badly), I used one of my Cuttlebug folders that was as close to a brick pattern as possible. I used fire brick distress ink and black soot to make it look as if the fireplace is used.
As always, I appreciate every comment, and visit to my krafting place! You all have a great weekend. Thanks for stopping by! Krafthead~


Materials
Cricut Expression II
Gypsy
Cartridges- Joys of the Season (stockings), Christmas Noel (wreath), Christmas Cheer (fireplace, candles)
Distress Ink- black soot (fireplace), walnut stain (edges), faded jeans(edges, stamp) , fire brick (fireplace)
Cuttlebug
Stickles- diamond
Copic markers-don’t remember which ones I used-sorry L
Martha Stewart- branch punch-discontinued version (wreath)
Twine (stockings)
Smooch- gold, orange and silver (candles/holders)
DCWV- Winter Combo and Christmas Combo 2010 releases
Kraft Cardstock-paper trey ink
Xyron design runner- contact information on the back
Various stamps for sentiments
Bling
Studio G ink-gold, red (sentiments)

Wednesday, October 19, 2011

Steelers Birthday

Hello Krafters!

I am here to share a quick card I made for my Pastor. He is a Pittsburg Steelers fan (smh) so I thought I would have a little fun with it. The card is really straight forward. I used MTC to make this card. On the inside, I used my Cuttlebug die and the matching embossing to make an area for the sentiment.
Thanks for stopping by my krafting spot! Krafthead~


Materials:
Paper Trey Ink Cardstock-black, yellow and white
DCWV-Linen Closet
Smooch-red and blue
Marvy Circle Punch ½ Inch
Make the Cut
Bosskut Gazelle
Cuttlebug-football die and embossing folder
Memento Ink-black
Inkadinkadoo-birthday sentiment

Monday, October 3, 2011

Sophie

Hello Krafters!

Today, I would like to share a project I made using Sophie. This is a very versatile cartridge. It is my second favorite Circle cartridge to date.  Anywho, I love butterflies and I thought this was the perfect project.
I used the card feature to cut out the card base in Paper Trey Ink’s Cream cardstock. For the pattern paper, I used various pieces of The Paper Studio Antique.  The butterfly was cut using the layer feature. I ran the card base and butterfly through the Cuttlebug using the Musical Flourish Embossing Folder.
I used white lace from my stash. To match the project, I dyed it using gold Glimmer Mist. As the lace dried, I inked the edges of the card base and butterfly using Walnut Stain Distress Ink. I added small pearls to the butterfly and the four corners. I attached the lace and added larger pearls with my glue gun.
On the inside of the card, I used the Martha Stewart Butterfly Edge Punch to add interest. It was punched using the same pattern paper used for the matting and butterfly on the outside. That’s it! A quick and easy project that can be used for several occasions.  Thanks for visiting, Krafthead~


Materials:
Cricut Expression2
Sophie Cricut Cartridge- card base 5.5x8.5 (fold in half to make A2 size card), butterfly 3.5”
Paper Trey Ink-vintage cream
The Paper Studio-Antique
Cuttlebug-Musical Flourish
Tim Holtz Distress Ink-Walnut Stain
Tattered Angels Glimmer Mist-Gold
Martha Stewart Punch-Butterfly
Lace
Pearls-4mm and 12mm
Glue Gun

*The card matches the altered box I shared a few days ago ;-)*

Saturday, October 1, 2011

World Card Making Day!

Happy Saturday Krafters!
Today is World Card Making Day! In light of today, I am sharing a few card projects I made over time for different occasions. Some are old creations and others are recent. Hope you all enjoy your day and I can’t wait to see your creations! Krafthead~
Shadow Box:

Love Birds:

Challenge Card:

Cameron:

Monday, August 22, 2011

I'm Back!!!

Hello Krafters!!!!
Did you all miss me? I missed each of you! I have been lurking, but unable to leave love on blogs nor could I upload projects to mine L. Everything seems to be in working order now YAY! Well, I have been a little busy during my hiatus. I didn’t do as much as I had liked since for a good while, it was SO warm here and I was unable to go into the craft room. On the flip side of that, I spent time with my girls J
Anywho, here is a quick project I would like to share. I participated in a challenge this summer and this was one of my entries. This card was so easy to make. It literally took minutes to put together with the help of the Cricut Imagine. I used the Teresa Collins Black and White Imagine Cartridge for the dress, Teresa Collins’ Baby Boutique for the background paper and Elegant Edges for the frame. I also used one of my favorite go to cartridges, Forever Young. Side note, it is a must have cartridge IMHO LOL!
I used my Distress-it-All to distress the edges. For a little texture, I used the Victoria Cuttlebug folder on the frame. Every pretty card needs ribbon right? I used a shear ribbon I had in my stash and tied a simple bow. I finished of the card by adding pearls to the frame and four corners of the card using the Viva Décor pens. These pens are AWESOME! They always dry rounded instead of having that little peak I would normally get when I used the Liquid Pearls. I also inked the edges. Enjoy!
I will try to NEVER stay away that long again!
Materials
Cricut Imagine
Teresa Collins Black and White Imagine Cartridge
Teresa Collins Baby Boutique Imagine Cartridge
Forever Young Cricut Cartridge
Elegant Edges Cricut Cartridge
Cuttlebug
Victoria Cuttlebug Folder
Viva Décor Pen-black and white
Bazzill White
Zutter Distress-it-All
Black Soot Distress Ink
Shear Ribbon