Friday, April 1, 2016

Sigma Shirts SASL DT Project

Happy April Krafters!!

Today is my day over at She's A Sassy Lady and I do not have a paper crafting project to share with you today. No, this is NOT an April Fool’s Day joke! I honestly have not done a card or anything in weeks. Instead, I will share a snippet of what I have been busy doing. 

Aside from being a house manager, I started a custom hobby/business a few years ago. Sublimation is part of what I do. Sublimation is a digital transfer of an image and burning the image into a substrate using a heat press or heat wrap. A substrate can include, but not limited to, t-shirts, mugs, picture frames, towels, phone case, and really the sky is the limit! The good thing about sublimated items is the images lasts forever. 

Today, I am sharing a shirt for the Sigma Gamma Rho division in my area. They had a conference and asked me to do the shirt for them. The client created the file and sent it to me. I converted it and I did my magic! What is awesome about these T-shirts is the fact they do not crack, peel, or fade! The Soros will have these shirts until the threads fall apart!

While this is not a traditional project share, I really do hope you enjoyed it! Remember to stop by often to check out other projects from the talented Creative Team. Until next time, enjoy the rollercoaster of weather we will have this month! Kraft head~

Friday, March 4, 2016

In Memory of Sassy Lady DT

Hey Krafty People!

Today is my day over at She's A Sassy Lady! Where did the time go? It is hard to believe it is already March!! I guess we are Marching right along..I know bad pun/joke, but I laughed. 

I don’t know about you, but people tend to spring projects on me…I can’t lie; it is very annoying but I do welcome the challenge! My mom’s friend wanted me to create a custom card in memory of her mother for her birthday. She also gave me a moment’s notice….literally.

For this project, I decided to do a easel card since this is near and dear to the recipient's heart. I used the Prima Lyric paper. I fussy cut the image as well as the lady’s photo. Pretty simple right. I added a little lace and an I Am Roses flower to it and that was it!


Easy peasy! Remember to stop by She's a Sassy Lady to check out the talented DT! Until next time, 

Krafthead~

Friday, February 5, 2016

It Was Mint SASL DT Project

Happy February Krafters!

It is my day over at She's A Sassy Lady! Come on over and join the fun!

Anyone who has been following me for a while knows I love to play on words; especially on cards. Sometimes printing out a sentiment is not what I want to do. I just want to stamp it out! I have been so excited since Silhouette gave us a teaser back in the late spring of 2015 of the new Mint Stamp Maker! I had a stamp maker some years ago but I could never get the transparencies to print dark enough to make the clear stamps. I had a lot of wasted emulsion pads...so frustrated! I am still hopeful for custom clear stamps one day, but I tell you, I am so happy with this little machine! Easy to use and no waste...unless it is user error!


I purchased it a few months ago and figured it was time to show case her! The software allows just about any image be turned into a stamp. The kit come with the software, cables, Mint, 2 stamp blocks (15mx30 & 30mx30), stamp sheets to fit the blocks, labels, ink, and case to cover the stamp. Once you have a block, you do not have to purchase another one unless you want. You can change the pad and use accordingly.  I will admit, the replacements are a bit costly, but the sheets come with two stamps…and to be able to make a stamp on the fly and not wait for shipping…it’s worth it to me!

So here is how it works:

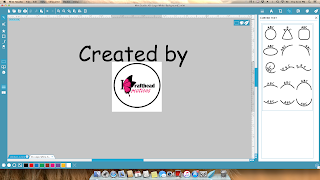
Open up Mint Studio-click design

Choose your stamp size

Open up your image. In my case, I used my logo….been wanting a stamp for LONG time!!


Resize the image to fit the stamp size

Add any text or images- can curve or customize the text


*Please note, if your image has different colors (mine has magenta), I suggest changing it to a full black and white image because it will not be on the final product as you will see at the end….
Once you are satisfied with your image, the software will automatically flip the image (not pictured)

Insert the stamp blank in the machine wait about a minute or so take off the access cardboard and plastic. Mount on the block, and ink with desired colors. Let the ink soak for a few moments, stamp off a few times until the image stamps clearly. Stamp as desired…replace cap to preserve the ink/stamp! 


That’s it!! Can you image all of the stamps that can be made?? Valentine's Day is coming up...just saying! I hope you enjoyed today’s project. Remember to stop by and check out She's A Sassy Lady…new projects are added all the time! Krafthead~

Friday, January 1, 2016

Memory Jar SASL DT Project

Happy 2016 Krafty People!!

Today I get to jump start the year over at She's A Sassy Lady! I am honored to be the first person from the talented She's A Sassy Lady team to wish you all a Happy New Year! May it be a year of creativity, joy, peace, love, prosperity, and favor. I know the team has some exciting projects to share. I suggest you check over there often to be inspired!

I have to admit, 2015 was a very challenging year. I personally am happy to see it come to an end and I am excited to see what 2016 brings! I most certainly believe the latter will be greater than the last!

Today’s project was inspired by a Facebook post I saw. It suggested writing down different events and placing them in a jar. At the end of the year, the participant will read them as a way to reflect on the year. As mentioned, 2015 was a trying year. I am guilty of not always seeing the silver lining during those difficult times. I am sure I am not the only one. Instead of waiting to the end of the year, whenever I forget to see how blessed I am or how many prayers has been answered, I think it would be good for me to go in the jar and read them. There is nothing wrong with having a reminder right?

For this project, you can use whatever you have on hand. I used a mason jar from the Dollar Store, but you can use an old box, create a box or an old piggy bank. You can dress it up, leave it plain…whatever you want. The point of this is to reflect! There is nothing like starting the year off the right way!!

I took out the inner lid and dressed up the outer lid with trim. I also added trim to the bottom of the jar. I had some sticky notes. To make this easier, I punched a hole and placed it on the jar with a pen attached. On the note, it is important to notate the date and the event. I also would like to take this a step further and add those special answered prayers, testimonies, and blessings in a separate book. Stay tuned for that (wink, wink)!


I really do hope this inspired you to do something similar. As I said, sometimes it is hard to see the blessings when you go through. This is a good way to be reminded just how blessed we are…my first note will be WE MADE IT TO SEE 2016!! Krafthead~