Happy February Krafters!
It is my day over at She's A Sassy Lady! Come on over and join the fun!
Anyone who has been following me for a while knows I love to play on words; especially on cards. Sometimes printing out a sentiment is not what I want to do. I just want to stamp it out! I have been so excited since Silhouette gave us a teaser back in the late spring of 2015 of the new Mint Stamp Maker! I had a stamp maker some years ago but I could never get the transparencies to print dark enough to make the clear stamps. I had a lot of wasted emulsion pads...so frustrated! I am still hopeful for custom clear stamps one day, but I tell you, I am so happy with this little machine! Easy to use and no waste...unless it is user error!
Anyone who has been following me for a while knows I love to play on words; especially on cards. Sometimes printing out a sentiment is not what I want to do. I just want to stamp it out! I have been so excited since Silhouette gave us a teaser back in the late spring of 2015 of the new Mint Stamp Maker! I had a stamp maker some years ago but I could never get the transparencies to print dark enough to make the clear stamps. I had a lot of wasted emulsion pads...so frustrated! I am still hopeful for custom clear stamps one day, but I tell you, I am so happy with this little machine! Easy to use and no waste...unless it is user error!
I purchased it a few months ago and figured it was time to show case her! The software allows just about any image be turned into a stamp. The kit come with the software, cables, Mint, 2 stamp blocks (15mx30 & 30mx30), stamp sheets to fit the blocks, labels, ink, and case to cover the stamp. Once you have a block, you do not have to purchase another one unless you want. You can change the pad and use accordingly. I will admit, the replacements are a bit costly, but the sheets come with two stamps…and to be able to make a stamp on the fly and not wait for shipping…it’s worth it to me!
So here is how it works:
Open up Mint Studio-click design
Choose your stamp size
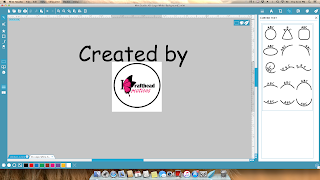
Open up your image. In my case, I used my logo….been wanting a stamp for LONG time!!
Resize the image to fit the stamp size
Add any text or images- can curve or customize the text
*Please note, if your image has different colors (mine has magenta), I suggest changing it to a full black and white image because it will not be on the final product as you will see at the end….
Once you are satisfied with your image, the software will automatically flip the image (not pictured)
Insert the stamp blank in the machine wait about a minute or so take off the access cardboard and plastic. Mount on the block, and ink with desired colors. Let the ink soak for a few moments, stamp off a few times until the image stamps clearly. Stamp as desired…replace cap to preserve the ink/stamp!
That’s it!! Can you image all of the stamps that can be made?? Valentine's Day is coming up...just saying! I hope you enjoyed today’s project. Remember to stop by and check out She's A Sassy Lady…new projects are added all the time! Krafthead~


Oh no, I don't need another gadget but I think I have to have this! Thanks for the demo.
ReplyDelete