Showing posts with label diaper cake. Show all posts

Friday, August 7, 2015

Welcome Baby Girl SASL DT Project

Hello Krafters!

It's my day over at She's A Sassy Lady blog!! I read somewhere August is known as the busiest month for birthdays/births. I do not know how true that is, but my mom was invited to a baby shower for a young lady who is due in August. She asked me to make an adorable card and I believe I did just that. 


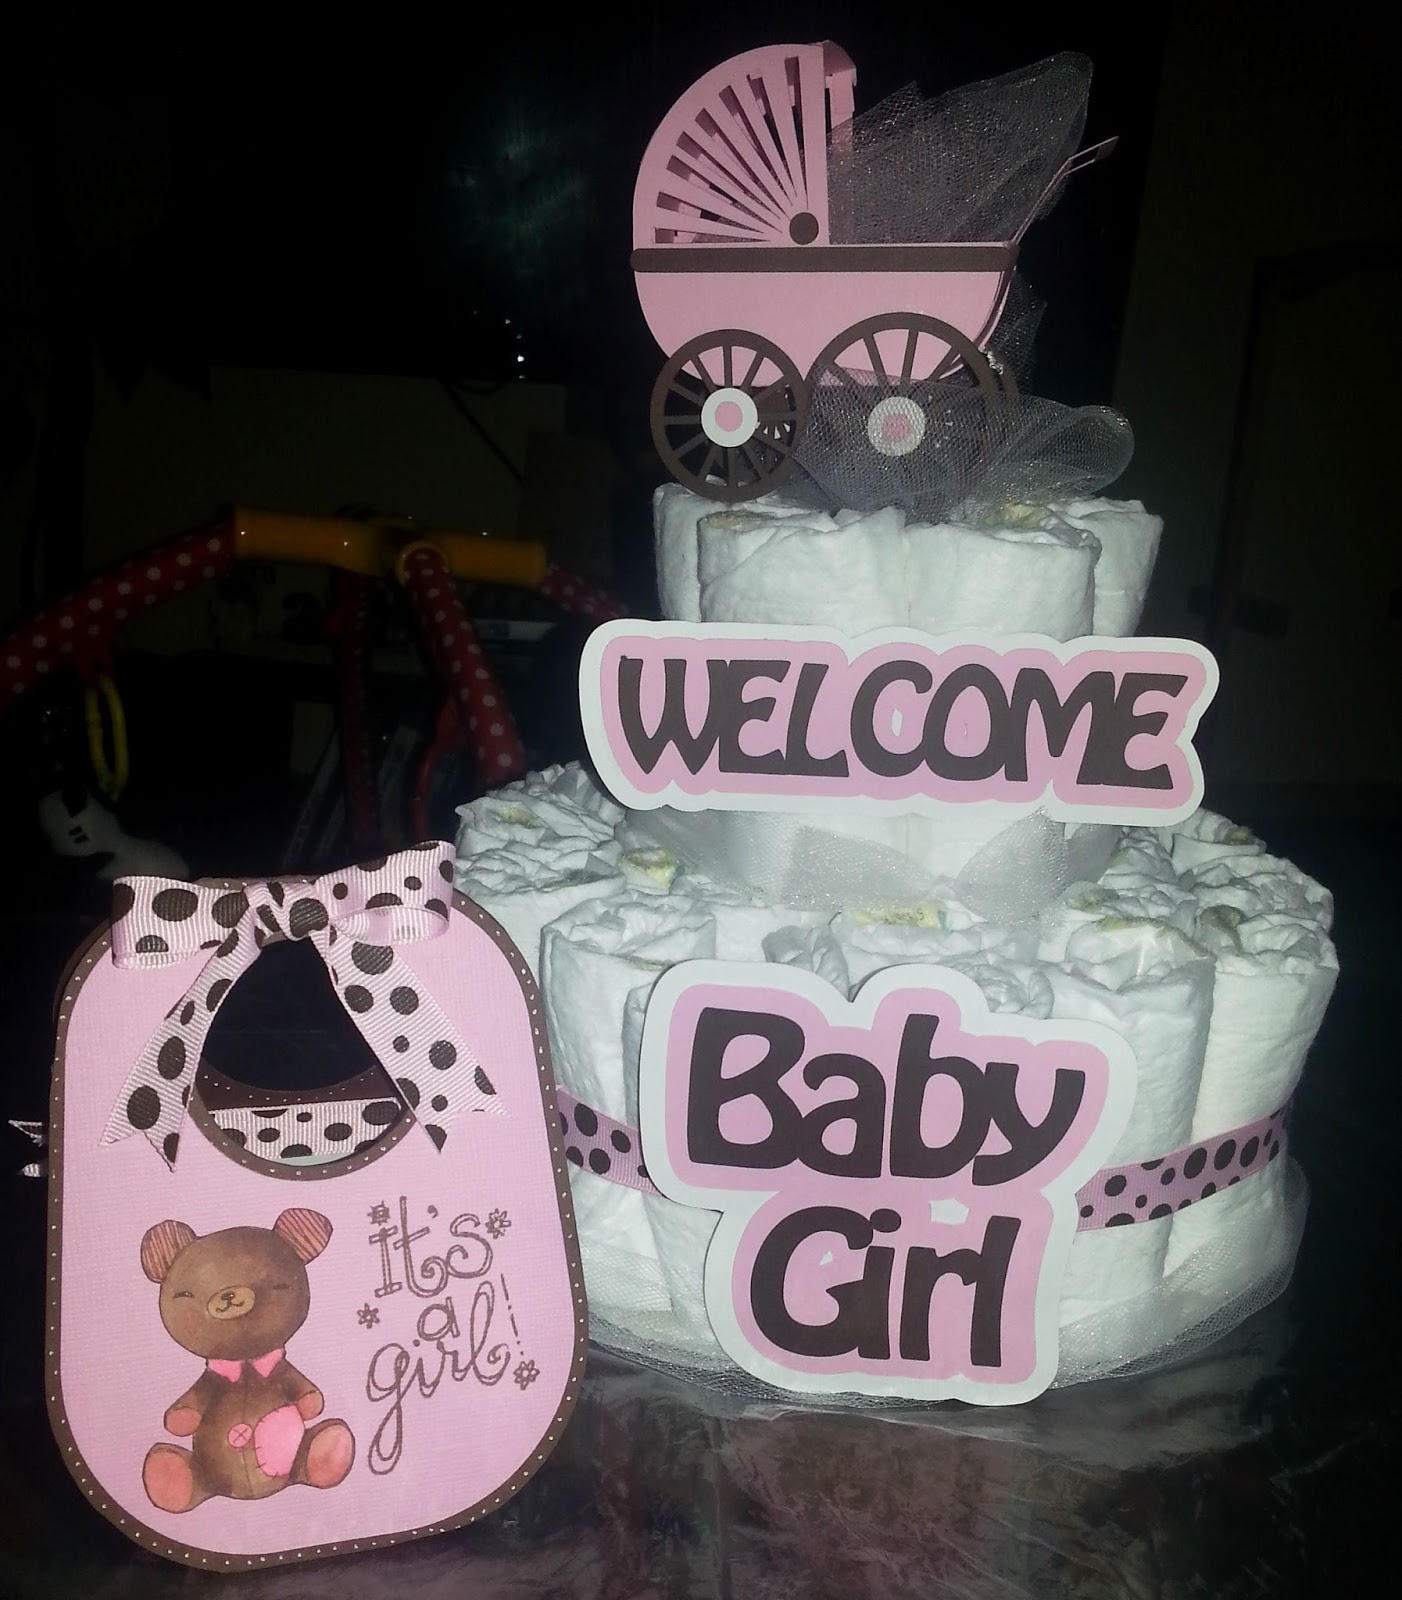
Since the lady is having a girl and I decided on a pink and brown color scheme. I love those two colors together; almost as much as baby blue and brown. The card was made using a Silhouette file (bib card) and I used a stamp set for the bear and sentiment by Inkadinkado. I used Cocoa Momento ink to stamp the images. I used Copic markers to color the bear image. I added faux stitching to the card because it looked unfinished to me. The file came with a bow, but I decided to use ribbon instead. On the inside (not pictured) I added the same pink and brown polkadot ribbon as well faux stitching.


Mom couldn't show up to the baby shower with just a card right? I surprised mom by making a simple two tier diaper cake. It really is the perfect gift! I mean, you can never have too many diapers for a new born! Anywho, I used the same color scheme and ribbon to tie the card with the gift. On the base of the cake is a sturdy board covered in white tulle (to hide the base). I assembled the “cake” and had to “cute it up”. I used TTF to make the “Welcome Baby Girl”. I typed out the sentiment (brown) used the offset feature in the software to create a shadow (pink) and repeated that to create the white border. The cake topper is a Silhouette file (3D Buggy). It was very easy to put together. To keep the topper in place, I used pins. Between the layers, I added more white tulle as well as in the buggy. 


I used a large cello bag to package the cake and that was it! I hope you enjoyed today’s project! Remember to stop by She's a Sassy Lady to check out the talented DT! Thanks for stopping by, Krafthead~

Tuesday, August 23, 2011

It's A Girl!

Happy Tuesday Krafters!
Today I want to share with you a card and my very first diaper cake.  I made these about a year ago. My husband’s cousin was expecting his first baby. I wanted to do something cute, but that would be a blessing to them as well.
For the card, I kept it simple. I used the Nursery Tails Imagine Cartridge for the pattern paper. I also used the Cricut Sampler for the buggy. I punched the top of the card with a Fiskars punch around the page. Every girl should have bling, so I added some to the card and the sentiment. I tied a simple knot in the ribbon and added buttons that I had in my stash to the buggy to finish off the card.
As I said, this was my very first diaper cake. This was a three tier cake. On the inside, I had it full of wipes, lotions and baby wash. I used these items to support the cake’s center. I wrapped the diapers around and secured them with ribbon. Once all of the tiers were assembled, I used tissue paper to make the cake look like fondant. I added ribbon to hide any seams or inconsistencies with the tissue paper. I also used the Imagine to add images around the cake. As a topper, I used a larger cut out of the “It’s a Girl” that was used as the sentiment on the card. Finally, I wrapped the entire cake with cellophane and tied a bow. I attached the card with a smaller piece of ribbon.
Hubby’s cousin and his girlfriend were very happy to receive it!
Thanks for looking :-)

Materials
Cricut Imagine
Nursery Tails Cricut Imagine Cartridge
Cricut Sampler Cricut Cartridge
Fiskars Punch Around the Page-Hearts
Bling
Scotch Quick Dry Adhesive
Tissue Paper-pink and yellow
Ribbon
Buttons
Cellophane
Diapers
Wipes
Johnson’s Baby Products


Saturday, May 21, 2011

It's A Boy!

Hello Krafters!
Today marks the final day of Celebration Week! It has been and thanks being a part of it. We had a card about me, a couple graduation cards, wedding card….What better way to end the week by celebrating a baby shower!
Diaper cake:
I cut a 10” circle out of chip board for the base and covered it with patterned paper.
Then I added a little lace around the base with a glue gun. Warning, use a tool if you can because the glue is HOT!


Here I took a tube from wrapping paper and cut it down to approximately 13” and cut the bottom to support the diapers. I added hot glue to adhere it to the base. Inside the support tube, there are wipes and diapers inside.

I rolled each diaper and added them to build the cake. Once I had the form of the cake, I used Electric Blue glimmer mist to make the white ribbon blue since I did not have any on hand. I cut shapes from the Nursery Tails Cricut Imagine cartridge at three inches and Designer’s Calendar Cricut cartridge. The “It’s A Boy” cuts on the center tier are 4”.
For the top of the cake, I used the Sizzix Create-A-Bow die. Disclaimer: use a large brad, not mini brads to hold the pieces together.  The paper says It’s A Boy.
Here is the final product before adding cellophane:
The card:
Standard A2 card. For the background paper or walls in this case, I used yellow Bazzill cardstock and ran it through the Cuttlebug using the Swiss Dots embossing folder. I also used DCWV Nana’s Kids for the pattern paper. The scallop is Bazzill Edge or the crown molding. I added a little brown cardstock as the floor.
The crib and chair I cut on my Gazelle since I did not have a rocking chair or crib on a cartridge. That is what I love about the Gazelle and Make-the-Cut software. If I don’t have what I need, I can find an image, trace it and cut it out! I also made a window pane in the program. I cut the moon and stars from the Pooh and Friends cartridge because I like how those looked on that particular cartridge.
I took a punch to make the clock pieces and hand cut the hands. I used the same It’s A Boy pattern paper used in the diaper cake so the card will have a similar element. I put a brad in the center of the clock.
To finish off the card, I added two teddy bear brads; one at the foot of the crib and one in the rocking chair. I hand cut the blanket, valence, mattress inside the crib and seat cushions.
I might make a few changes to the card, but overall, it works.
Products used
Cricut Expression
Cricut Imagine
Bosskut Gazelle
Cuttlebug            
Xyron Creatopia
Cuttlebug Swiss Dots embossing folder
Nursery Tails Imagine cartridge
Designer’s Calendar Cricut cartridge
Sizzix Create-A-Bow die
Hot glue gun
DCWV Nana’s Kids
Bazzill cardstock-yellow, brown, white
Bazzill edger
Paper Pizazz-It’s A Boy and Moon and Stars pattern paper
Recollections dark blue cardstock
Brads
Diapers
Wipes
Ribbon
Tattered Angels Electric Blue Glimmer Mist
Scor tape
Lace
Chipboard
Thanks for looking!