Sunday, January 19, 2014

Journey-Scraps of Color DT Project

Hi Krafters!

Here's the first project of 2014! As many of you know, I like to make something out of nothing. I feel confident in saying, most of you do too! I am a member of the audio ministry at my local place of worship. Sometimes, the CDs do not copy correctly or we throw away the clear filler disc. I have shared an etching project using them. Well today, I have a mini album using the "throw aways".

For this project, I used the CDs and KaiserCraft's 75 Cent paper collection. The good thing about the CDs is the fact you will have a sturdy photo album. I also used the Mod Podge Molds and other random embellishments. To make the process faster and easier, I used a Cricut E2 preloaded cartridge to cut the circles to fit the discs. I sized them at 4.75; which was perfect!


This is an album for my husband so I wanted to keep it simple. So I focused on the front of the album more than the inside. I used Old Paper Crackle Paint, Stencils and Stucco (Martha Stewart) for interest and texture. The gears were made using the Gear Spellbinder Dies. They were colored with Copper Inka Gold. I used Scrabble pieces for his initials. The title was colored with copper mixatives and I used a flourish by Zva (just for a touch of bling).

The inside was simply embellished with charms made with the molds and extra gears. I also added a photo mat for pictures and he can write journaling (I doubt he will) on the pattern paper if he chooses to.

That's it! What are some old products or "throw aways" do you like to bring new life to? I would LOVE to know!  Thanks for stopping by, Krafthead~

Friday, December 20, 2013

PS DT Project Treat Holders With A Spin

Hi Krafters!

It's my day to post over at Practical Scrappers! Here is the post....enjoy!!

Hi Fellow Scrappers!

Kenya here to share a project with you all. I don't know about you, but time is moving so quickly, I can barely keep up! Usually, I make treat bags for the students to help them get into the holiday season. However, I did not have the oomph to do it this year. I decided to make one "big" treat holder (for each of the girls that attend school) for the entire class. I used two 3D files (3D tree and 3D sleigh) from the Silhouette Store to make them. I modified them to fit the Dumb Dumbs (suckers).
For the tree, I resized it to make it a bit larger. I cut each of the pieces and assembled. Once assembled, I used my Big Bit to make holes for the suckers. You could add holes to the file to eliminate this step. Since there is a base, I marked the holes from the top of the tree and punched those out as well. The suckers are the tree's ornaments!
 
The sleigh was a little more involved but so worth it to me (I made two of them). I assembled the sleigh as it would be normally. I added an insert and punched holes for the suckers on the inside of the sleigh. Since the weight of the suckers were too heavy, I reinforced the sleigh with two support boxes on the bottom of the sleigh.

 
 I used a sturdy cardstock. You can use cute pattern papers and go as elaborate as you choose. I decided to keep these simple since they are going to given to elementary school aged children.

I hope you enjoyed today's project(s)! What do you think? Pretty cute huh?!?! I think so! Happy Holidays to each and every one! Krafthead~

Thursday, December 19, 2013

SOC DT Project-Christmas Wall Project Share....On the Cheap!

Hi Krafters!

I know it has been months and Sundays since my last post! So much has happened....

I wanted to share this month's DT project for Scraps of Color. Here it is:


OMGness Christmas is less than a week away! Have you decorated your home yet? I JUST finished! Sad but true. Today I would like to share a couple of projects with you that is easy to put together and get the kiddos involved! Best of all, you can use what you have on hand :)

Snowflake:

Supplies-

 Parchment paper or a non-stick mat

Pearls/beads loose

Pearl/bead strand

Hot glue (gun)

1. First lay down a dab of glue to the mat and press in a pearl or bead.

2. Add a glue around the pearl/bead and add more beads around the center bead

3. Add a line of glue making sure glue is touching the cluster of beads in the middle

4. Design as you wish

If the children are doing this, please supervise them as the glue is HOT!! The snowflake can be used as an ornament or as I did here as an embellishment to this wall hanging.

Wreath:

You will need-

Die cutting machine

Wreath file-mine is from the Silhouette Store

Beads

Ink

Ribbon

Glue

Cardstock/paper (of course)

I cut out the circle and the leaves from the file. I did not cut all of the pieces that came with the file. You may want to cut extra leaves to make your wreath fuller. I used a blue and white cardstock which coordinates with the color scheme of the tree. Once the components were cut, I stapled the ribbon to the base layer. While I was doing this, the girls used ink to ink around the edges. We  assembled the leaves and adhered them down. I added silver beads (again to go with the color scheme, but you can use any color you wish) in clusters to mimic berries. We did this randomly throughout the wreath. Once the wreath was dry, I tied the ribbon we stapled earlier and added the snowflake embellishment.

Here is the finished wall:
 

I hope you enjoyed today's project! It is a good way to get some projects done and keep the kids busy too. Thanks for stopping by, Krafthead~

Saturday, October 19, 2013

SOC-With Sympathy

Hi Krafters!

Krafthead here to share a simple project with you! I don't know about you, but I have a track record of buying scrappy products and not always using them or using them to the fullest. Today's project is using some of those unloved products! I hope you enjoy and that it will inspire you to pull out some of your "stash" as well!

As I was looking for something in the craft lab, I found some watercolor paper I picked up from the dollar spot at one of the local big box stores probably a year ago. I remembered I had some of Distress Markers and I had an idea. I also used my stamp/die combo that I used once before by Hero Arts and Sizzix.
 
When my father passed away, a scrappy friend of mine sent me a beautiful card. It had a watercolor effect on it and that was the inspiration for this card. I used various colors of the Distress Markers/Distress Inks and a water pen to add the scene effect. Watercolors can add a very subtle look to a project. Playing with watercolors can be fun and a great way to express yourself! I really like how this project turned out.

 
Share what's in your stash you forgot about or goes unloved? Krafthead~

Friday, October 11, 2013

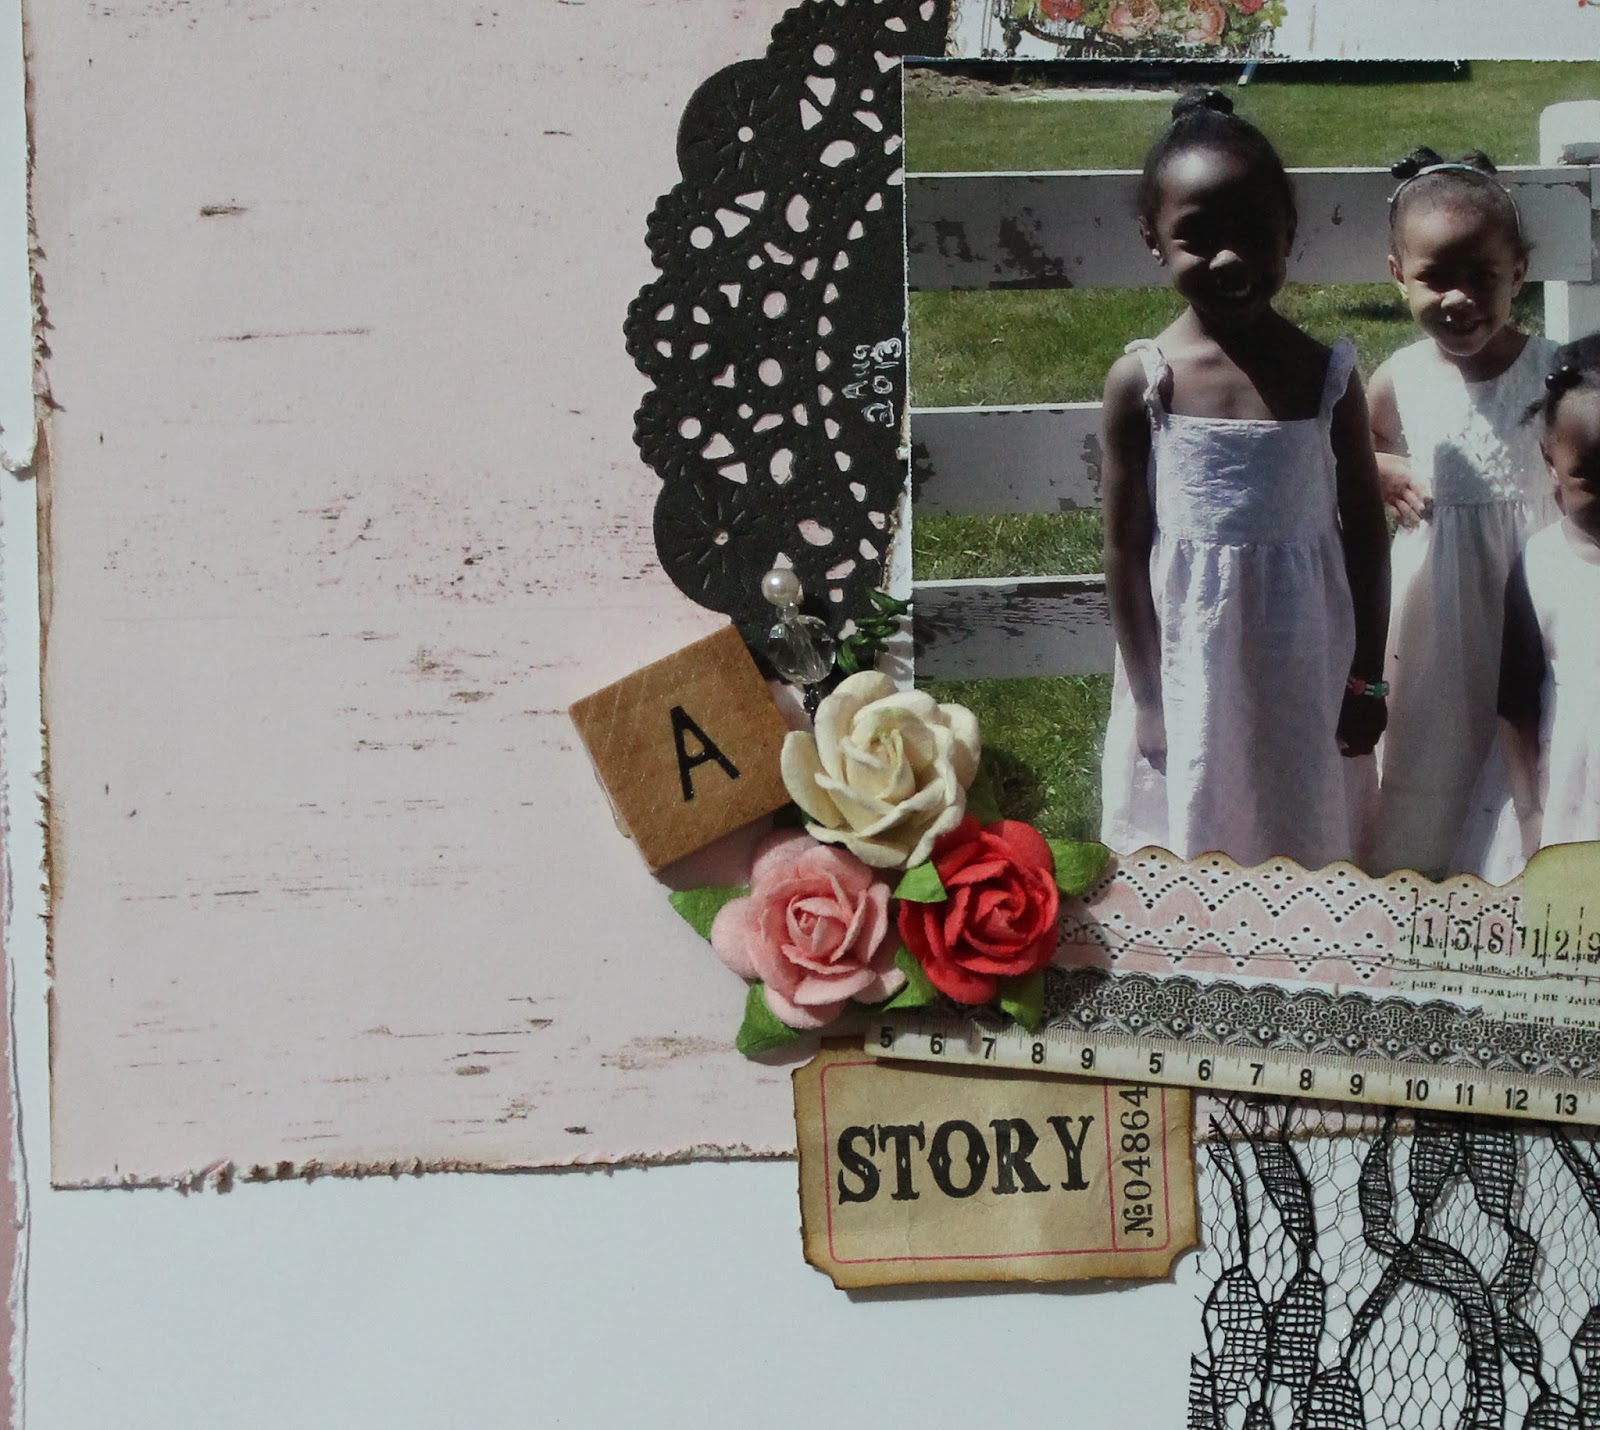
A Love Story

Hi Krafters!

I love being a part of Beautiful Awakening. I get to combine my love for Christ with my love for paper crafting! Go over there and check it out!

Here is my project post! Enjoy!


Children are truly a blessing from God. In Psalms 127:3 it says, "Children are a heritage from the Lord, offspring a reward from him." I honestly did not understand what that scripture meant until I had children of my own. I knew children were a blessing, but never considered them as being a reward. Now I know because I could not imagine my life without them.

So today I am sharing my layout titled A Love Story. It is showcasing our (husband and me) four blessings! This photo was taken after church back in August. They looked so adorable in their dresses I decided to snap a quick photo of them. They are so precious and innocent. I want to hold on to this memory forever!

Each day I am reminded of the favor the Lord allowed me to have in these four young ladies. Although I want them to stay young, I look forward to seeing what they will become. I pray you were blessed by today's posting. Thank you for stopping by! Krafthead~
 
Supplies:
Prima-Lyric 8.5x11 and 6x6 stacks
Lace,
Prima Wooden Clocks
Scrabble Piece
Tim Holtz Ticket
Prima Fairy Roses
Cameo
Stick Pin
Cheery Lynn Doily Die


Wednesday, October 9, 2013

PS-Pumpkin Picking


Hi Krafters!
Today is my individual post over at Practical Scrappers! Here is my posting:
 

I have to admit, I enjoy this time of year! I love summer, but it is something about the leaves changing colors and the crispness in the air. My family and I drive to the country to see the vivid colors of the leaves. We also have made it a tradition to visit the pumpkin farm each year.  There is nothing sweeter than seeing my little girls running through the patch looking for that perfect pumpkin! The only rule is, they can only take a pumpkin they can carry (although that doesn't always happen).

For today's project, I am sharing one of our trips to the Family Farm! I was able to capture each one of them looking, feeling and lifting the pumpkins to make sure it was "the one". I am looking forward to our trip this year!


We have been to different pumpkin farms, but this trip was the best and most memorable to date! They not only have pumpkins and hay rides, but a full operational farm! The girls really loved seeing all of the animals. Stay tuned for more projects LOL.  I loved being able to hang out with my family. What is your fall family tradition?

I hope you enjoyed today's project. Come back to check out more awesome projects! Kenya~


Supplies:

G45-Place In Time

Authentique-Thankful

DCWV-Harvest

Stencil

Modeling Paste

Burlap

Recollection-Wooden Word Bubbles

Tim Holtz-Walnut Stain

Thursday, September 26, 2013

Beautiful Awakening!

Hi Krafters!

Today I formally announce my design team membership for the Beautiful Awakening blog! I have been on the team for about a month and I am loving every bit of it. To give you a little background, it is a faith based blog where we share our love for Christ and ministry as a whole. Currently, I am working with two other wonderful ladies who share my passion of Christ and crafting!

Here are the projects I shared thus far:

Digital layout of my FIL and baby girl. Visit Beautiful Awakening to get the story behind the project.


A sympathy card I made for a fellow crafter. 


This final project is a card for a new convert. Follow the link above to get the story behind this project. 

I hope you enjoyed today's project! Thanks for stopping by, Krafthead~